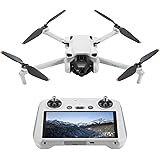
Have you ever wondered what goes into building an advanced tool for modern farming, like a hexacopter agricultural drone? The journey from a box of components to a fully functional, crop-spraying machine is both intricate and rewarding. While the video above provides an excellent visual guide to the installation of an EFT EP drone frame, specifically the E616P agricultural plant protection drone, this article delves deeper into each step, offering expanded insights, beginner-friendly explanations, and practical tips to ensure your EFT EP drone assembly is successful and rewarding.
Understanding the Essentials: Required Components for Your Agricultural Drone Installation
Before embarking on the exciting process of your hexacopter agricultural drone assembly, it’s vital to gather all the necessary parts and tools. Think of it like preparing ingredients for a complex recipe; having everything ready prevents delays and ensures a smoother build. The core components include the drone frame itself, which is the skeleton of your UAV, along with the spray system, motor set, control system, power system, and a range of essential tools. Each element plays a crucial role, from the propellers that provide lift to the nozzles that deliver vital nutrients or protection to crops.
Pre-Assembly Preparation: Welding Key Components for Drone Functionality
The very first step, even before you start bolting the frame together, involves a crucial pre-assembly task: welding. This isn’t just about sticking things together; it’s about creating secure, reliable electrical connections that are the lifeblood of your agricultural plant protection drone. Key components requiring welding include the motors, the CANHUB module (which acts like a central nervous system for data communication), the PMU (Power Management Unit) for stable power delivery, the water pump, and the camera. When welding motor cables, remember the golden rule: Red is Positive, Black is Negative. Getting this right is like connecting the right wires in your home; missteps can lead to malfunctions or damage. Always use heat shrink tubing and a heat gun for insulation, creating a neat and robust connection that can withstand the rigors of flight and agricultural work.
Bringing the Frame Together: Step-by-Step Drone Frame Installation
With your components prepared, it’s time to build the foundation of your EFT EP drone assembly. This involves carefully unpacking and installing the main drone frame, which will eventually house all the complex electronics and spraying mechanisms. It begins with removing the cover and control board to access the internal structure, then installing the AS150U cable and its holder, paying close attention once again to the positive and negative connections. Think of this as laying the groundwork for a building; every piece must be perfectly aligned and secured for structural integrity.
Constructing the Foundation: Attaching Power Holders and Frame Legs
The next phase involves securing the power holder and installing the frame legs. These legs are more than just landing gear; they also support the drone’s weight, protect vital components, and house parts of the spraying system. When attaching the power holder, initially leave the screws slightly loose – this allows for minor adjustments later. Once the legs are inserted into their mounting seats and aligned with pilot holes, you can then tighten all screws securely. Ensure the side with the screws on the leg supports faces outwards for proper assembly, much like fitting the pieces of a puzzle together with the right orientation.
Propelling Progress: Installing Arms and Motors for Flight
A hexacopter drone, as the name suggests, relies on six powerful motors to achieve flight. Correct installation of the arms and motors is paramount for stable and efficient aerial operations. First, sleeve the arm tubes into the folding parts of the frame, fixing them with screws and clamps. Then, the X8 motor set is installed, with cables carefully passed through the arm tubes and into the drone body to prevent tangling or damage. Securing each motor firmly is like making sure the engine of a car is bolted down; it prevents any dislodging during high-speed operation.
Achieving Balance: Correct Motor and Propeller Orientation
A critical detail in hexacopter agricultural drone installation is understanding motor rotation. For stable flight, motors are configured as either Clockwise (CW) or Counter-Clockwise (CCW). The E616P model places CW motors at M2, M4, and M6 positions, while CCW motors are installed at M1, M3, and M5. Imagine stirring a pot; some motors spin one way, others the opposite, creating balanced thrust. Misplacing a motor can lead to uncontrollable flight. Once all arms are inserted, aligned, and locked into place, the drone body is turned over, and all screws are tightened to ensure a robust structure, ready for the water pipe clamps on specific arms.
Nurturing Growth: Building the Spraying System for Precision Agriculture
The true purpose of an agricultural plant protection drone lies in its ability to precisely apply liquids to crops. This requires a robust and efficient spraying system, which begins with the installation of the tank. The tank’s accessories, including the filter and cover, are assembled and then the tank is mounted onto the frame legs, ensuring it aligns with the drone’s body direction. Think of the tank as the reservoir for life-giving nutrients or protection, meticulously designed to integrate with the drone’s structure.
From Pump to Nozzle: Laying Out the Waterway System
The spraying system’s heart is the water pump, typically installed at the rear or center bottom of the tank. Softening water pipes with a heat gun allows for flexible, secure connections between the tank outlet, flow meter, and the pump inlet. The waterway layout, moving from the pump outlet through various I-type and T-type interfaces, is then routed along the frame legs and secured with clamps. This intricate network is like the circulatory system of the drone, ensuring a consistent and controlled flow of liquid to the nozzles. The final step involves attaching the nozzles to the bottom of the M1, M2, M3, and M6 arm motors, extending them as needed for optimal spray coverage. Each nozzle is carefully positioned to provide an even and effective spray pattern, crucial for efficient crop treatment.
Enhanced Safety and Precision: Integrating Advanced Radar Systems
Modern agricultural drones are equipped with advanced sensors to ensure safe and efficient operations. Radar systems are key to this, allowing the drone to “see” its environment. The installation involves assembling the ground radar and the front and rear obstacle avoidance radars. The ground defense radar is typically mounted above the water pump, providing real-time terrain following capabilities – imagine a drone that can hug the contours of the land like a bird, maintaining a consistent spraying height. The obstacle avoidance radars, positioned at the front and rear of the tank, act like extra sets of eyes, detecting obstacles in the drone’s flight path and preventing collisions. These systems are invaluable for navigating complex farm landscapes and ensuring the drone’s longevity and safety.
The Brain of the Operation: Flight Control System Installation
Every complex machine needs a brain, and for an agricultural drone, that’s the flight control system. This sophisticated network of electronics governs every aspect of the drone’s flight and functions. The main controller is fixed centrally on the board with 3M glue, crucially with an arrow pointing towards the drone’s head. All motor signal wires (M1-M6) are inserted into their corresponding ports, ensuring the main controller can command each motor precisely. The PMU, responsible for stable power to the flight controller, and the receiver, which interprets signals from the remote control, are also carefully fixed and connected.
Precision Navigation: Integrating GPS, RTK, and Camera Systems
For high-precision agricultural plant protection drone operations, advanced navigation is a must. The GPS module, typically installed on an arm like M1, provides location data. Even more crucial for centimeter-level accuracy is the RTK (Real-Time Kinematic) system, with its components often mounted on arms like M3 and M6, feeding precise positioning data to the flight controller. Think of RTK as an ultra-refined GPS, allowing for incredibly accurate spray patterns and repeatable flight paths. The camera, fixed at the drone’s head, provides visual feedback, and the flowmeter signal wire connects to the main control, allowing for precise monitoring of liquid dispersion. All these components, from the CANHUB module (a data communication hub) to the LED tail light, are meticulously connected to the main control board, creating a seamless, intelligent system ready to execute complex tasks.
Preparing for Takeoff: Debugging and Calibration for Optimal Performance
Once all components of the EFT EP drone assembly are physically in place, the drone isn’t quite ready for flight. Just like fine-tuning a musical instrument, the drone needs careful debugging and calibration. The first critical step is leveling all six motors. Using a level to adjust and tighten screws ensures that each motor is perfectly aligned, preventing any instability or faulty flight behavior. This step is like making sure all the wheels on a car are perfectly balanced; even a slight misalignment can cause serious issues.
Safety First: Power Checks and Remote Control Calibration
Before connecting the battery, a multimeter test for short-circuits is essential. No beeping sound indicates that the power plug is safe to use. Next, the battery is secured, and its voltage (e.g., 50.5V for this model) is measured and recorded for remote control calibration. Turning on the remote control (like the H12) and powering on the drone allows access to the advanced settings (often via a password like ‘8888’). Here, you’ll select the correct drone frame type (e.g., E616P is a six-axis type), set sensitivity parameters, and customize channel functions for spraying or other operations. This calibration process ensures that your remote control commands translate perfectly into the drone’s movements and functions, providing you with precise control over your hexacopter agricultural drone installation.
The Moment of Truth: Spray Debugging and Flight Test
With the drone calibrated, the final stages involve ensuring the spraying system works perfectly and performing the inaugural flight test. After powering off, unfolding the arms, and powering on again, a small amount of water is poured into the tank for a spray test. Crucially, any air must be evacuated from the sprinkler system by briefly spraying until a consistent, even mist emerges. This step confirms that the entire waterway is functional and ready for actual plant protection tasks.
Taking Flight: Final Checks and Operational Testing
The last physical step before flight is installing the paddles, carefully matching CW paddles to CW motors and CCW paddles to CCW motors. This is as important as putting the correct tires on a vehicle; the wrong orientation means no effective thrust. After powering on, unlocking the drone by moving the joysticks (often 45 degrees down to the center) initiates the motors. Basic flight tests involve observing how the drone responds to joystick commands for movement, confirming that all motors, sensors, and the flight control system are working in harmony. Activating the spray function (e.g., via button ‘A’) confirms the drone’s primary purpose is functional. Once satisfied with its performance, a smooth landing completes the debugging of your new agricultural drone, marking it ready for productive work on the farm.