Have you ever watched a drone gracefully soar through the sky, performing acrobatic maneuvers or capturing breathtaking aerial footage, and wished you could do the same? Many aspiring pilots feel that initial thrill, only to be intimidated by the complex controls, the fear of crashing an expensive piece of equipment, or simply not knowing where to begin. It’s a common hurdle for anyone new to the fascinating world of multi-rotor flying. However, with the right guidance and a structured approach, mastering the fundamentals of drone flight is an achievable and incredibly rewarding journey. The video above from Flite Test offers an excellent initial look at the core principles, and this article will expand upon those critical foundational steps, providing a comprehensive guide for every beginner drone pilot.
Embarking on Your Drone Flying Journey: Start Small and Smart
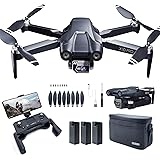
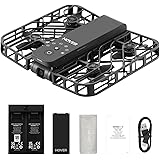
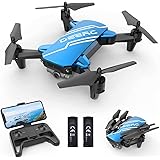
The initial excitement of purchasing a drone can often lead beginners to acquire advanced models with numerous features like integrated cameras, GPS stabilization, or First Person View (FPV) capabilities. Nevertheless, for those truly looking to learn to fly a multirotor, starting with a basic, durable, and forgiving model is paramount. This strategic choice minimizes the financial impact of inevitable crashes while maximizing your learning potential. Consequently, you build confidence and muscle memory without the constant anxiety of damaging a costly investment.
Models like the Nano QX, Syma X1, or Hubsan X4 are frequently recommended as ideal first multi-rotors. These miniature drones are designed to withstand numerous bumps and tumbles against walls, furniture, or the ground, making them perfect training tools. Their lightweight construction and inexpensive parts ensure that repairs are either minimal or affordable, allowing you to focus on developing your piloting skills rather than worrying about constant maintenance. Think of these small drones as your flight simulator in the real world, providing immediate feedback on your control inputs in a low-risk environment.
Demystifying Multi-Rotor Controls: Understanding Your Transmitter
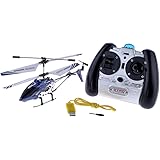
A fundamental step in learning to fly a drone is understanding what each stick on your transmitter (controller) does. While there are different control modes, Mode 2 is the most prevalent in the United States and is typically what most beginners encounter. In this configuration, the left stick primarily controls throttle and yaw, while the right stick manages pitch and roll. Grasping these four basic movements is essential for gaining complete command over your multi-rotor.
- Throttle (Left Stick, Vertical): This controls the power to all motors, directly impacting the drone’s altitude. Pushing the stick up increases motor RPM, causing the drone to ascend; pulling it down decreases RPM, causing descent. Precise throttle control is critical for maintaining a steady hover.
- Yaw (Left Stick, Horizontal): Yaw dictates the drone’s rotation around its vertical axis. Moving the stick left causes the nose of the drone to turn left, while moving it right turns the nose right. This control is vital for changing the drone’s heading without altering its flight path.
- Pitch (Right Stick, Vertical): Pitch controls the drone’s forward and backward movement. Pushing the stick forward tilts the drone’s nose down, causing it to move forward. Pulling it back tilts the nose up, prompting backward movement.
- Roll (Right Stick, Horizontal): Roll governs the drone’s sideways movement. Pushing the stick left tilts the drone to the left, causing it to move left. Similarly, pushing it right tilts the drone right, resulting in rightward movement.
It is important to recognize that multi-rotors do not “glide” like traditional airplanes. As a consequence, they require constant small corrections on all axes to maintain a stable position. This continuous input is a defining characteristic of multi-rotor flight and is a skill that develops with dedicated practice. Therefore, dedicate time to understanding how each stick input translates into drone movement, preparing you for more advanced maneuvers.
Mastering Orientation: Your Visual Compass in the Sky
Perhaps the most challenging aspect for new drone pilots is maintaining orientation. Unlike an airplane where the nose typically points in the direction of travel, a multi-rotor can face any direction while moving in another. When the drone is flying away from you, its controls mirror your stick inputs. However, when it turns and flies towards you (nose-in), the controls become reversed from your perspective, often leading to panic and crashes. This phenomenon is known as “reverse stick syndrome” and is a major hurdle for many.
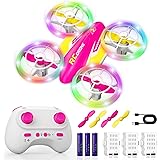
To aid in orientation, manufacturers and hobbyists often employ visual cues. Many multi-rotors feature different colored propellers in the front compared to the back (e.g., black in the rear, white or orange in the front). Furthermore, some pilots will color the drone’s booms or add a distinct marker, such as a bright ball or an arrow, to the front. These visual identifiers become critical as you gain distance from the drone. Initially, always strive to keep the drone facing away from you (tail-in) to simplify control inputs. This practice establishes a consistent visual reference, allowing you to internalize the basic movements more effectively.
Essential Flight Training Techniques for Beginner Drone Pilots
Once you understand the basic controls, a structured training progression will help you build proficiency. These steps are designed to incrementally introduce complexity, ensuring a solid foundation before advancing to more difficult maneuvers. Patience and repetition are your greatest allies in this learning process.
The Art of the Hover
Your first and most crucial objective is to achieve a stable hover. This fundamental skill requires precise control of the throttle to maintain a consistent altitude, along with constant micro-adjustments on the pitch, roll, and yaw sticks to keep the drone in one spot. It is recommended to “punch” the drone off the ground rather than slowly lifting it. The air close to the ground, often referred to as “dirty air,” can make stable takeoff more challenging due to ground effects and turbulence. Popping it up quickly helps avoid getting snagged on grass or uneven terrain.
Practice hovering using multiple battery packs—the video suggests as many as 20, 30, 40, or even 50 batteries. This extensive practice is not an exaggeration; it builds the crucial muscle memory and fine motor skills necessary for all subsequent maneuvers. Moreover, learn to fly without any auto-level or self-stabilization features turned on. While these assist modes are helpful later, mastering manual control first ensures you truly understand the craft’s physics, much like learning to drive a stick shift car before an automatic. This foundational knowledge will empower you to pilot any multi-rotor, regardless of its technological assists.
Walking the Dog: Expanding Your Control
Once you are comfortable holding a stable hover, the next step is to introduce controlled movement while maintaining your orientation. “Walking the dog” is an excellent technique that teaches you coordinated control. This involves flying the drone forward, then using yaw (rudder) to turn it, and flying it forward again, creating a rectangular or square path. The key is to keep the drone’s tail facing towards you throughout the entire maneuver. As you turn the drone with yaw, you will also need to make subtle corrections with pitch and roll to keep it moving in the desired direction. This exercise trains your thumbs to work together, combining rudder with other controls—a skill vital for precise drone operation.
Tail-In Circles: Mastering Coordinated Turns
After successfully “walking the dog,” try flying circles around yourself, always keeping the drone’s tail pointed towards you. This technique further refines your coordinated control. You will use pitch to maintain the drone’s distance from you, rudder to keep the tail facing inward, and roll (ailerons) to move it left or right around your position. This maneuver develops a deeper understanding of how these three inputs work in harmony to control the drone’s trajectory while continuously maintaining a simple visual orientation.
The S-Turn: A Bridge to Pattern Flight
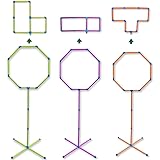
Before attempting a full, complex pattern that might involve flying directly towards yourself (nose-in), practice S-turns. Fly the drone down to your left, make a single turn, and then bring it across your field of view to your right, maintaining a slight standoff distance. This strategy helps you get accustomed to turns and directional changes without the immediate disorientation of a nose-in approach. The S-turn provides a continuous trajectory, which is often easier to manage than the static complexity of a nose-in hover. This progression gradually exposes you to more intricate flight paths, easing the transition to complete pattern flying.
Embracing Pattern Flying
Ultimately, your goal is to be able to fly a complete pattern, such as a right-hand or left-hand circle. This is arguably one of the most challenging maneuvers for a multi-rotor due to the constant need for coordinated turns. Unlike airplanes that benefit from “bank and yank” turns, multi-rotors absolutely require rudder input to turn effectively. You must use both roll and rudder simultaneously to achieve smooth, controlled turns. When flying a pattern, it is crucial to continually provide input to the controls. Letting the drone “coast” can quickly lead to loss of orientation and unexpected crashes. Always be actively piloting the craft, making small, continuous corrections to guide it along its path.
Prioritizing Safety in Your Drone Piloting Journey
Safety is paramount in the multi-rotor hobby. Unlike foam airplanes that might cause minor damage in a crash, a multi-rotor with multiple spinning propellers can cause significant injury to people or animals, and substantial property damage. Therefore, always be acutely aware of your surroundings.
When learning to fly, choose an open field with minimal obstacles, and always keep a safe distance from people, pets, and property. If you find yourself in a precarious situation where a crash seems imminent, the best course of action is almost always to “chop the throttle.” Cutting power immediately minimizes the speed and force of impact, potentially turning a catastrophic crash into a more manageable repair. It is far better to repair a bent boom or replace a propeller than to risk severe injury or damage by attempting to “save” an out-of-control drone. Furthermore, if flying at a club or shared space, openly communicate your beginner status to other pilots, ensuring everyone is aware and can take appropriate precautions.
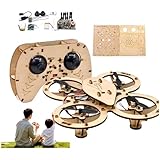
The Path Beyond the Basics: Build, Tune, and Grow
Learning to fly is merely the first of three major learning curves in the multi-rotor hobby. Once you are comfortable piloting, the next steps involve understanding how to build your own drone and then how to tune it for optimal performance. The ElectroHub, for example, is highlighted as an excellent platform for those ready to delve into building their first multi-rotor, offering a practical introduction to components and assembly.
Do not be discouraged by crashes or slow progress; every experienced pilot has gone through countless learning experiences. Simulators can supplement real-world practice, helping you build confidence and test maneuvers without risk. The journey to becoming a proficient multi-rotor pilot is a marathon, not a sprint, requiring patience, persistence, and a dedication to continuous learning. Ultimately, embracing these steps will allow you to learn to fly a multirotor with skill and confidence, opening up a world of exciting possibilities in the RC drone hobby.
Clearing the Air: Your Multirotor Q&A
What kind of drone is best for beginners to learn on?
Beginners should start with a basic, durable, and forgiving model like the Nano QX or Hubsan X4. These smaller drones are inexpensive and can withstand many bumps and crashes, which helps build confidence.
What are the four basic flight controls on a drone’s transmitter?
The left stick controls Throttle (altitude) and Yaw (rotation), while the right stick controls Pitch (forward/backward movement) and Roll (sideways movement). Understanding these four movements is key to controlling your drone.
What is ‘reverse stick syndrome’ and how can I avoid it as a new pilot?
‘Reverse stick syndrome’ is when the drone flies towards you, making the controls feel reversed from your perspective, often leading to confusion. To avoid it, always try to keep the drone facing away from you (tail-in) and use visual cues like colored propellers for orientation.
What is the first and most important skill to master when learning to fly a drone?
The first and most crucial objective is to achieve a stable hover. This requires precise throttle control to maintain altitude and constant small adjustments to keep the drone in one spot.