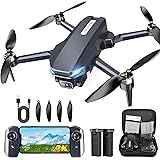
The journey into FPV (First-Person View) drone flying, while exhilarating, often presents a significant hurdle: the cost. Many aspiring pilots find the upfront investment in high-performance equipment daunting, leading to compromises that can hinder performance or durability. However, the good news is that constructing a formidable freestyle FPV quadcopter doesn’t necessarily demand a premium budget; strategic component selection and careful assembly can yield an exceptional build without breaking the bank. The accompanying video above provides a practical, step-by-step guide to assembling a 5-inch 6S quadcopter, showcasing how a blend of affordability and quality can be achieved.
This article expands upon the video’s foundational instructions, delving deeper into the critical considerations and nuanced techniques essential for a successful and robust budget FPV drone build. From understanding why specific components are chosen to mastering the intricate art of soldering, every detail is explored to ensure your DIY quadcopter not only takes flight but excels. We aim to equip you with the advanced knowledge required to navigate common challenges, optimize your build for performance, and truly appreciate the engineering behind your aerial machine.
Strategic Component Selection for a Budget FPV Drone Build
Selecting the right components is paramount for any FPV drone, especially when balancing performance with a budget. The video highlights several crucial parts, each chosen for its specific advantages within a cost-effective framework. A robust frame, for instance, serves as the backbone of your quadcopter, dictating its durability and customizability. The iFlight frame featured offers an abundance of stacking options and 3D-printable attachments, facilitating extensive personalization and repairability. This modularity is a significant benefit, allowing for easy replacement of parts and the integration of various accessories found on platforms like Thingiverse, ultimately extending the lifespan of the drone.
In contrast, the electronic stack, comprising the Electronic Speed Controller (ESC) and Flight Controller (FC), is often considered the brain and muscle of the FPV drone. The Mamba F405 MK3 Lite edition stack, despite its “Lite” designation, is a testament to the advancements in budget-friendly electronics, packing essential features like a 9-volt OSD (On-Screen Display). This integrated approach simplifies wiring significantly, requiring only a single wire connection between the ESC and FC, which streamlines the build process and reduces potential points of failure. The Rush video transmitter (VTX) is another example of a component balancing performance and cost, highly recommended by a significant portion of the FPV community for its reliability and excellent signal quality, although more economical alternatives are also available for those with tighter constraints.
The camera choice, such as the Foxeer T-Rex, contributes directly to the FPV experience, with theoretical promises of great video quality. However, it is the collective harmony of these components that defines the drone’s overall capability. Considerations extend beyond the main parts to essential tools, including a comprehensive hex driver kit, wire cutters, and a quality soldering iron. Even seemingly minor accessories like braided motor wires, which are readily available and inexpensive, contribute significantly to a clean build, offering protection against shorts that could potentially fry an ESC—a common and costly mishap for new builders. Every component, from the frame to the smallest wire, is selected with an eye toward maximizing value and minimizing potential build issues.
Mastering Soldering: Essential Techniques for FPV Drone Assembly
Soldering is arguably the most critical skill for an FPV drone builder, directly impacting the reliability and longevity of the quadcopter. The video demonstrates fundamental techniques, such as preparing pads by tinning them with solder before attaching wires, and crucial troubleshooting steps like fixing solder bridges. A key insight shared is the importance of not fearing leaving the soldering iron on the board slightly longer when tinning, which ensures proper heat transfer and a strong bond, especially with difficult ground pads which act as heat sinks.
Specific soldering temperatures are vital for effective work, with recommendations ranging from 380°C for general pad preparation to increasing temperatures up to 440°C for soldering thicker gauge wires, such as those for the XT60 connector. This higher temperature is necessary because thicker wires dissipate heat rapidly, effectively acting as heat sinks themselves. When working with leaded solder, as is common among hobbyists, maintaining a temperature around 350-360°C is generally advised to protect the iron’s tip, though temporary increases are acceptable for challenging joints. A critical safety note is the correct orientation of components like low ESR capacitors; reversing polarity will cause them to fail spectacularly and is a mistake to be diligently avoided, as the negative side of the capacitor must always align with the negative terminal on the ESC. Furthermore, the careful routing of motor wires, especially to prevent them from crossing or touching the carbon fiber frame, is paramount to avert short circuits that could lead to fried motors or ESCs.
Precision Connections: Flight Controller and ESC Wiring
The intricate wiring of the flight controller (FC) and Electronic Speed Controller (ESC) forms the nervous system of your FPV drone, demanding meticulous attention to detail. Initially, connecting peripherals like the camera, video transmitter (VTX), and receiver to the FC is prioritized. This ensures these smaller, often delicate, connections are completed before the FC is mounted, providing easier access to solder pads. For instance, the camera typically requires connections for video signal (yellow), ground (black), and 5-volt power (red), which are standard across most FPV cameras.
In contrast, receiver connections can vary based on the protocol used. An S.Bus FR Sky receiver, for example, typically connects to a specific inverted R1 pad on an F4 flight controller, alongside ground and 5-volt pads. Conversely, other popular systems like TBS Crossfire might utilize different UARTs (Universal Asynchronous Receiver/Transmitter) or pads, and FlySky’s I.Bus protocol often connects to a non-inverted R1 pad. Consulting the FC’s documentation is always recommended to ensure correct pin assignments for your specific receiver. For the VTX, connections for video input (VTX pad), ground, and 9-volt power are standard. The inclusion of a TX (transmit) pad, such as TX3, allows for advanced VTX control via your FPV goggles, enabling remote channel and power changes—a feature that significantly enhances convenience in the field. This capability, however, relies on the VTX also supporting such protocols.
The ESC, the power distribution and motor control unit, requires its own set of critical connections. The installation of a low ESR capacitor is a standard practice, particularly for 6S builds, as it helps smooth out power delivery and mitigate electrical noise, providing a cleaner video feed and protecting components. This capacitor must be oriented correctly, with its negative lead aligned to the ESC’s negative terminal, and mounted securely to prevent contact with the carbon fiber frame, which could cause a short. Each motor’s three wires are then soldered to the corresponding pads on the ESC, with correct motor numbering (typically 1 at the back right, then counter-clockwise around the quad) being crucial for proper motor rotation and flight stability.
Perhaps the most challenging connection is soldering the XT60 power lead to the ESC. This involves thick gauge wires that require a significant amount of heat from the soldering iron to achieve a solid, reliable joint, as these wires rapidly absorb and dissipate heat. The process often demands a higher iron temperature (e.g., 440°C) and careful application of solder to prevent cold joints or accidental bridging. It’s critical to ensure the positive (red) wire connects to the ‘+’ pad and the negative (black) wire to the ‘-‘ pad. Any error here, especially polarity reversal with the capacitor, carries a high risk of damaging the entire electronic stack upon initial power-up. These detailed steps underscore the precision required in building a high-performance FPV drone.
Final Assembly and Pre-Flight Checks for Your FPV Quadcopter
Once the intricate soldering of the flight controller, ESC, and power leads is complete, the final assembly phase focuses on securing components within the frame and performing critical pre-flight checks. The physical integration of the ESC and FC stack within the frame requires appropriate standoffs and screws. While M3 screws are typically used for securing the stack, ensuring sufficient length is vital to prevent squishing components or causing shorts. The video highlights a common issue of needing longer M3 screws, which, while minor, emphasizes the importance of having the correct hardware. Furthermore, components like the VTX often require specific mounting solutions; frames frequently include 3D-printed parts or dedicated screw holes, such as those for M2 screws, to securely house the VTX and protect its MMCX antenna connector.
Routing and securing wires are equally important to prevent them from interfering with propellers or getting damaged in a crash. The careful management of wires not only contributes to a clean aesthetic but also enhances durability and reduces the likelihood of signal interference. Before the initial power-up, a thorough visual inspection is indispensable. This includes checking all solder joints for bridges or cold connections, verifying component polarity, and ensuring no wires are pinched or shorting against the carbon fiber frame. The video emphasizes the importance of motor protectors, which are typically installed before motor screws, to extend the frame’s lifespan by absorbing impacts from landings, particularly on hard surfaces like concrete. These small yet crucial details collectively contribute to the overall robustness and longevity of the budget FPV drone.
Upon completion, the physical characteristics of the build, such as its weight, become evident. A freestyle quad like the one built in the video, weighing 371 grams without propellers, battery, or a GoPro, indicates a solid, durable construction designed to withstand the rigors of acrobatic flight. This weight is typical for a 5-inch freestyle platform, allowing for effective kinetic energy management during maneuvers. The subsequent step, as noted in the video, involves configuring the quadcopter using software like Betaflight, where parameters such as receiver protocols (S.Bus, Crossfire, I.Bus) and VTX control (SmartAudio, Tramp) are set. This software-based configuration, while outside the scope of the build process itself, is integral to getting the FPV drone flight-ready. The careful execution of each step in the build process, from component selection to final assembly, culminates in a high-performing budget FPV drone, ready for its maiden flight and subsequent tuning.
Cleared for Takeoff: Your Budget FPV Drone Build Q&A
What is an FPV drone?
An FPV (First-Person View) drone allows you to fly by seeing what the drone sees through special goggles, providing an immersive experience. This guide helps you build a freestyle quadcopter for FPV flying.
Can I build an FPV drone without spending a lot of money?
Yes, the article shows that constructing a high-performance FPV quadcopter doesn’t necessarily require a premium budget. Strategic component selection and careful assembly can lead to an exceptional build.
What are some important parts of an FPV drone?
Key components include a robust frame for durability, an electronic stack (ESC and Flight Controller) as the drone’s brain and muscle, a video transmitter (VTX) for signal, and a camera for your view. Essential tools like a quality soldering iron are also needed.
Why is soldering an important skill for building an FPV drone?
Soldering is critical because it directly impacts the reliability and longevity of your FPV drone. Proper soldering techniques ensure strong electrical connections and help prevent costly issues like shorts or component failures.
What should I check before powering up my FPV drone for the first time?
Before the initial power-up, you must perform a thorough visual inspection. Check all solder joints for bridges, verify component polarity (especially capacitors), and ensure no wires are pinched or shorting against the frame.